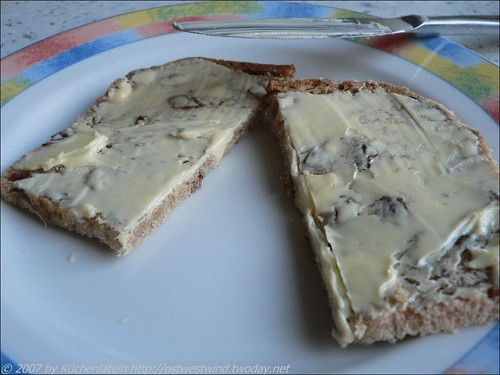
A delicous bread for breakfast: Sweet, nutty, crunchy and delightfully scented by toasted sesame seeds. Just good buttered!
| -========= |
REZKONV-Recipe – RezkonvSuite v1.4 |
| Title: |
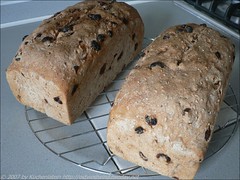
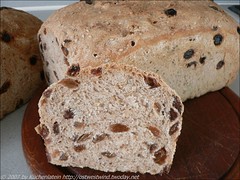
Breakfast Loaf with Sesame Seeds and Raisins |
| Categories: |
Bread, Poolish |
| Yield: |
2 9 By 5-inch loaves, about 1 kg each |
Ingredients
| H |
POOLISH |
| 177 |
ml |
|
Spring water (24°C/75°F.) |
| 1/2 |
teasp. |
|
Dry yeast |
| 120 |
grams |
|
20% bran wheat flour* |
| 75 |
grams |
|
Whole wheat flour, preferably coarse |
| |
|
|
Ground |
| H |
FINAL DOUGH |
| 75 |
grams |
|
Sesame seeds |
| 533 |
ml |
|
Spring water |
| 1 |
teasp. |
|
Dry yeast |
| 270 |
grams |
|
Whole wheat flour, preferably coarse ground |
| 22 1/2 |
grams |
|
Fine sea salt |
| 480-630 |
grams |
|
20% bran wheat flour* |
| 450 |
grams |
|
Golden seedless raisins |
Source
| |
Edited *RK* 07/09/2007 by |
| |
Ulrike Westphal |
Directions
MAKE FEND FERMENT THE POOLISH (allow 2 to 10 hours) Combine the water and yeast in a medium bowl. Let stand 1 minute, then stir with a wooden spoon until yeast is dissolved. Add flours and stir until the consistency of a thick batter. Continue stirring for
about 100 strokes or until the strands of gluten come off the spoon when you press the back of the spoon against the bowl. There will be lively bubbles on the surface. Cover with a clean damp towel or plastic wrap and put in a moderately warm (23°C/74°F – 27°C/80°F.) draft-free place until it is bubbly and has increased in volume.
PREPARE THE SESAME SEEDS (20 minutes; includes cooling) Place the sesame seeds in a small dry skillet. Cook over medium heat, stirring constantly, until lightly toasted, 2 to 3 minutes. Transfer immediately to a plate, place in the refrigerator, and cool completely.
MIX AND KNEAD THE FINAL DOUGH (25 minutes) Measure the remaining ingredients and calculate the necessary temperatures. Bring the bowl with the poolish to your work space. The poolish should be soupy, bubbly, and puffy and it should have a wheaty aroma. Scrape the poolish into a 6-quart bowl. Add the water and yeast. Break the poolish up well with a wooden spoon and stir until it loosens and the mixture foams slightly. Add the whole wheat flour and cooled sesame seeds; stir until well combined. Add the salt and enough bran flour to make a thick mass that is difficult to stir. Turn out onto a well-floured surface. Knead, adding more of the remaining flour as needed, for 10 minutes. Gradually knead in the raisins and continue kneading until the dough is soft and smooth, 15 to 17 minutes total. The dough is ready when a small amount pulled from the mass springs back quickly.
FERMENT THE DOUGH (2 to 3 hours) Shape the dough into a ball and let it rest on a lightly floured surface while you scrape, clean, and lightly oil the large bowl. Place the dough in the bowl and turn the dough to coat the top with oil. Take the dough’s temperature: the ideal is 28,5°C/78°F. Cover with a clean damp towel or plastic wrap and put in a moderately warm (23°C/74°F – 27°C/80°F) draft-free place until doubled in volume.
Note: If the dough temperature is higher than 28,5°C/78°F, put it in a cooler than 28,5°C/78°F place like the refrigerator until the dough cools to 28,5°C/78°F. If it is lower than 28,5°C/78°F, put it in a warmer than 28,5°C/78°F. place until the dough warms to 78°F. The point is to try to keep the dough at 28,5°C/78°F. during its fermentation. If you do have to move the dough, be gentle and don’t jostle it, or the dough may deflate. The dough has risen enough when a finger poked 1/2 inch into the dough leaves an indentation.
DIVIDE AND SHAPE THE DOUGH INTO LOAVES (10 minutes) Deflate the dough by pushing down in the center and pulling up on the sides. Transfer the dough to a lightly floured work surface and knead briefly. Cut into 2 equal pieces. Flatten each with the heel of your hand, using firm direct strokes. Shape each piece into a 9-inch-long log, sealing firmly and pinching closed.
PROOF THE LOAVES (1 1/2 to 2 hours) Place the loaves seam side down in lightly buttered 9 X 5 x 3-inch baking pans. Cover with a clean damp towel or plastic wrap and put in a moderately warm ((23°C/74°F -27°C/80°F)
draft-free place until dough rises just to the rim of the pan.
BAKE THE LOAVES (40 minutes) Forty-five minutes to 1 hour before baking, preheat the oven and homemade hearth or baking stone on the center rack of the oven to 230°C/450°F. The oven rack must be in the center of the oven. If it is in the lower third of the oven, the bottoms of the breads may burn, and if it is in the upper third, the top crusts may burn.
Using a sharp serrated knife or single-edged razor, score the loaves by making quick shallow cuts 1/4 to 1/2 inch deep on the top of the loaf. Place the pans on the hearth and bake 15 to 20 minutes. Reduce heat to 205°C/400°F. and bake until loaves are a rich caramel color and the crusts are firm, another 15 to 20 minutes. To test the loaves for doneness, remove from the pans and hold upside down. Strike the bottoms firmly with your finger. If the sound is hollow, the breads are done. If it doesn’t sound hollow, return breads to the pans and bake 5 minutes longer. Cool completely on a wire rack.
Note: If you prefer a soft top crust, brush the warm loaves with melted butter after removing them from the oven.
* 20% bran wheat flour: 3 parts by weight bread flour (Type 550) and 1 part by weight whole wheat flour
=====
*=Affiliate-Link zu Amazon
more recipes in English
more recipes from Daniel Leader
**13.01.2019 http://www.columbusfoodie.com/ and http://www.columbusfoodie.com/2007/07/05/announcing-bbd2-bread-with-fruit/ no longer available
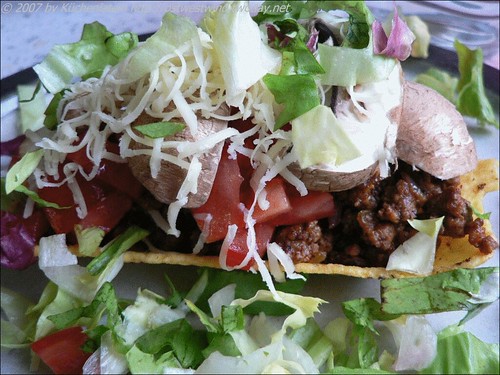
 Mein erste (Rund-)Reise in den USA führte von San Diego in den Big Bend National Park. Auf dem Weg dorthin habe ich das erste Mal einen Taco-Salad gegessen. Das besondere daran war, dass er wie hier 18.01.2021 ** in einer essbaren Taco-Schüssel serviert wurde. Hier in Deutschland hatte ich bislang nur die u-förmig gebogenen Taco-Shells gefunden.
 In der Feinkostabteilung unseres Standard-
Supermarktes haben wir dann dieses Produkt 09.08.2023 ** entdeckt. Damit war dann auch die Essensfrage geklärt und somit stammt mein Beitrag für das American Cooking Festival aus dem Bereich Tex-Mex-Küche. Selbstverständlich haben wir diese Gewürzmischung für unser Hackfleisch verwendet und das Schälchen nach Belieben gefüllt.
Taco Salad
Lecker, der Taco Salad, obwohl nach diesem Rezept kann man das Schälchen auch selbst herstellen. Dazu den noch warmen Teig über einem Schälchen abkühlen lassen.
** 18.01.2021 https://snapguide.com/guides/make-a-taco-salad-shell nicht mehr verfügbar
** 09.08.2023 ttp://www.brucefoods.com/casa-fiesta.html nicht mehr verfügbar

 Sara from I like to cook chose Red and White for the 18th editon of Weekend Cookbook Challenge. The right idea to combine red currants and beaten egg whites.


 *
*


 Susan from